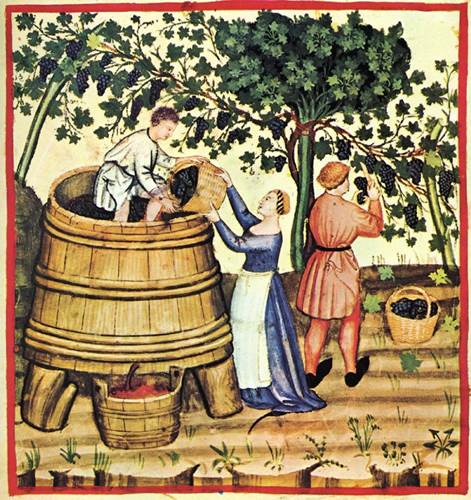
 Harvesting and pressing grapes, miniature by Giovannino de Grassi from the Theatrum sanitatis, manuscript, Italy 14th Century.
Making wine at home is relatively easier than what most people would commonly believe. Wine lovers around the world are following this growing trend to make their own wine at home.
If you decide to do it, there isn’t a whole lot of equipment that you would need and it won’t be too long before you’ll have your favorite wine to savor. However, there’s one thing you have to adhere to; you’ve to stick meticulously to a basic set of rules that is presented in the following step-by-step guide to making wine at home.
Step 1: Getting Grapes for your Wine
‘Common Grape Vine’
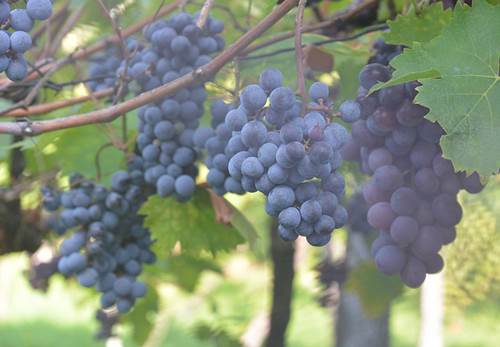
Vitis Vinifera (Common Grape Vine) in Venzone, Friuli-Venezia Giulia, Italy – Photo Courtesy: Alois Staudacher
The basic and most important element for making any kind of wine is, of course, the grapes. So the first thing that you have to keep in mind is that you should not choose just any kind of food grapes as not all grapes will give you a good flavor of wine. Instead, you have to look for the ‘Common Grape Vine’ – also called Vitis Vinifera – from which a majority of wines are produced and which is cultivated almost all over the world now.
Buying is Easier than Growing
If you’re thinking of growing your own grapes, think again. Growing grapes by yourself is not an easy task as it takes at least three to four long years to get a crop of grapes suitable for winemaking. Also, most of us are not likely to have enough of an area or space to grow them.
So, it’s much easier to buy your grapes for your own wine by locating a grape plantation nearest to where you live – provided you live in an area with a suitable climate for the same. If not then you may be able to find a reseller who sells the Common Grape Vine. Right at the outset though, you must be aware that there are a lot of elements and bacteria that take part in the wine fermentation process and they cover the outer layers of the grapes. You must make sure that the grapes are NOT washed or processed with a cleaning agent when you buy them and also remember to NOT wash them afterwards too. This may sound strange to first timers; however, this is the magic of winemaking that is heavily influenced by even the smallest change in bacteria or elements.
Your best options to produce a fine quality of wine is to find a vineyard and buy grapes right there; some of them let you pick them yourself by hand too. This way you get to choose the best grapes and that will help you make some really good wine. Make sure, while picking, that you pick only the dry ones; for best results, try to get them during the period of mid-September to mid-November (that’s a norm in most regions).
2. Preparation and Crushing of Grapes
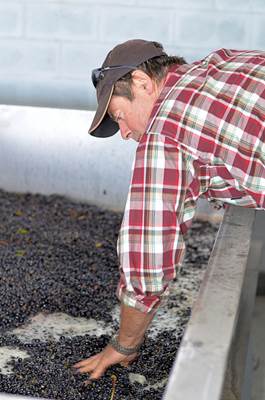 Winemaker Steve Lubiana checks crushed and de-stemmed Pinot Noir wine grapes prior to fermentation in open top vats in in southern Tasmania, Australia. The Lubiana family create cool climate, artisan wines from grape to glass in Australia’s picturesque Derwent Valley. Photo & Info: Mark Smith
Removing the Stems
You’ve chosen and bought your grapes – nice – it’s time to dive into the process now. One of the most demanding tasks in the winemaking process is the preparation and crushing of grapes. Before doing anything else, you have to separate the grapes from their stems. This is the hard part as all of it has to be done manually and there is no way to speed up this process. While going through this process, you’ll also have to remove any rotten, green or imperfect grapes that you come across.
Enamel Container and Crushing Tool
After you have removed the stems and separated the perfect grapes, put them all into a large enamel container, or a large enamel sauce pan if you don’t have a container. Now get a kitchen tool to crush the grapes, like the ones that you might be using to make mashed potatoes. However, please make sure to carefully clean the container being used, as well as your crushing tool before you start. It is okay to use a mild or neutral chemical cleaner for this purpose as the goal here is to get rid of all or any of the bacteria that might be residing on the tool or the container.
Start Crushing
Once ready, fill the container with your grapes and crush away with abandon. It might take a little effort as you’ll have to crush all of the grapes to get a kind of mash that will become the material for your soon-to-be made wine.
3. The Fermentation Process
If you followed all the earlier steps diligently, you’ll have a certain amount of nicely mashed grapes that would become the basis of your upcoming wine. It needs to be mentioned here that some form of fermentation is already under process by this time in the more advanced recipes. However, since we’re following a basic wine making guide, we’ll stick to the easiest and least complicated process.
Separating the Juice from the Mash
As pointed out in previous stages, you must sterilize everything that will come in contact with the future wine mixture. Although wine fermentation is a kind of nature’s magic unto itself, it follows the rules of chemistry, and you must keep all possible bacteria out. Else, you might lose a part or, worse, the whole batch as it won’t produce the desired results.
Okay, it’s time to separate the juice from the mash. In order to do that, use a good and clean filter and make double sure that no mash remains in the juice. Next, pour this juice into large glass bottles – 5 to 20 litres or 1 to 5 gallons capacity bottles are the ones most commonly used – that you can buy from your local winemaking shop. If these are not available close to where you live, there is also the option to order them online.
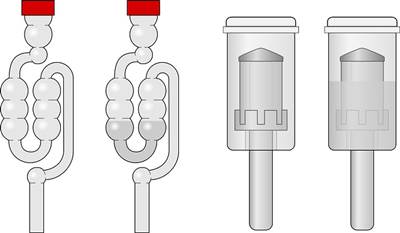
Airlocks
In addition to the bottles, you should also consider getting some airlock equipment, like the kind shown above. It is not too expensive and will help ensure that you don’t face any problems with the delicate fermentation process.
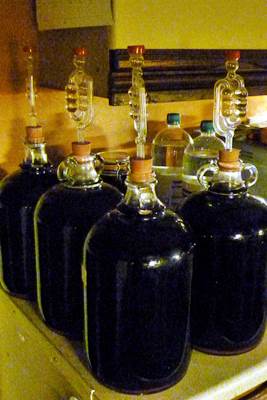
Pour the juice now in the bottles and seal them with airlocks. Fill upto 2/3rd of the bottles and keep one-third empty so that the wine can get some space to start showing its magic. You must have a storage space ready for these bottles where the temperature has to be kept at +5 degrees C; if you’re unable to ensure this temperature then it’s better to leave the bottles only half full.
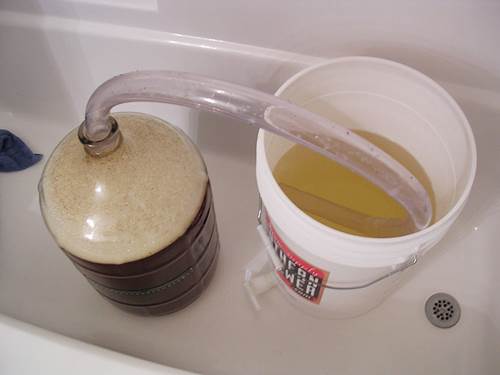
Blowoff tube in a makeshift airlock made by Matthew; he says, “The airlock was getting overwhelmed, so I put on a tube and let the carbon dioxide escape into a bucket of weak iodine solution (for sanitation)”. Photo & Info Courtesy: Matthew Frederickson
There are two ways of getting a proper airlock. Either you buy one or you make one! At its very basic, an airlock can just be a cork with a hole in its middle in which you insert a tube. While one end of this tube goes into the wine bottle, the other goes into a small glass container filled with water. While the wine goes under fermentation, it emits carbon dioxide that is expelled as bubbles in the water container. In this way, the airlock and water combination helps you to monitor if all is going well. If you notice the absence of bubbles, check the seals of the bottle and the tubes for any defects. Of course, the end of bubbles also signifies the end of the fermentation; however, that’ll not be happening in the first few weeks of the process. So, keep checking periodically.
4. Storage of Wine
Finally, it’s time to store the bottles in a dark ventilated room that has a +5 degree C temperature. Usually, a cellar is the best place to store but if you’re unable to make such an arrangement then you must make sure to pour less juice (half a bottle only) in each bottle, as mentioned in the earlier step too. However, it’s always best to aim for the recommended temperature.
Time Required for Storage
The total time required for storage is around two to three months; for example, the grapes that are gathered in September-October will become wine, if all goes well, by New Year’s Eve. However, you are free to experiment according to your own storing set-up using airlocks. When you notice that a bottle is no longer emitting carbon dioxide, you may open it to try and taste the wine while leaving the others undisturbed for further fermentation. If you open your bottles on a varied timeline, it will allow you to observe the effect of the different degrees of fermentation on the taste of the wine.
Congratulations, you’ve taken your first steps as a real winemaker!
A Final Note:
The step-by-step guide provided above outlines the simplest and easiest method of making wine at home. However, it is always desirable to learn it in this basic way before you dabble in the more complex forms of fermentation and move on to the exciting but difficult steps like blending. If you’re still curious though, there are some basics of how to improve the taste of homemade wine.
Leave a Comment